Cleaning your kitchen from top to bottom doesn’t have to be stressful—an organized approach makes the task faster and more effective. Start by clearing clutter: put away dishes, food, and countertop items to give yourself space to work. Begin at the top: dust light fixtures, shelves, and cabinet tops, so any falling dust can be cleaned later.
Move to appliances, wiping down the exterior and handles of the fridge, microwave, oven, and dishwasher. Next, clean countertops, backsplashes, and cabinet faces using an all-purpose cleaner to remove spills and stains. Tackle the sink and faucet with disinfectant, scrubbing away grime and water spots.
Don’t forget small details like cabinet handles, switches, and drawer fronts. Finally, sweep and mop the floor thoroughly, making sure to reach under appliances. By following this top-to-bottom routine, your kitchen will be sparkling clean, organized, and inviting for cooking and family time.
Why Keeping Your Kitchen Clean Is Essential
Your kitchen is often the busiest space in your home, whether it’s a place for family meals, homework, or experimenting with recipes. A clean kitchen isn’t just about appearances—it’s essential for hygiene, safety, and efficiency. Regular cleaning prevents the spread of bacteria, reduces the risk of foodborne illness, and ensures your appliances operate effectively. From dusting high shelves to scrubbing floors, maintaining a clean kitchen also helps keep your cooking space organized, inviting, and stress-free.
Make Your Sink Shine
The kitchen sink is one of the dirtiest spots in the house, hosting bacteria from food scraps, dishes, and handwashing. To deep-clean your sink, create a solution using 1 ounce of bleach, ½ quart of water, and 1 teaspoon of dish soap. Spray the mixture over the sink, wait about five minutes, then scrub with a large brush. For hard-to-reach areas, like around the faucet and drain seam, use a toothbrush, then rinse thoroughly with hot water.
To refresh your garbage disposal, pour ½ cup of baking soda followed by 1 cup of vinegar into the drain, allowing the mixture to bubble for a minute before rinsing with hot water. Grinding lemon peels through the disposal not only cleans the blades but leaves a pleasant, fresh scent. Cleaning your sink regularly keeps this high-traffic area sanitary and extends the lifespan of your plumbing.
Deep-Clean Your Refrigerator
Even with routine spill wipes, your refrigerator can harbor bacteria, mold, and lingering odors if not cleaned thoroughly every few months. The interior temperature of a standard fridge, around 40°F, is ideal for germs, says Philip Tierno, PhD, a microbiologist from NYU.
Clean Behind and Under the Fridge
Over time, the area behind and beneath your refrigerator becomes a magnet for dust, pet hair, crumbs, and other debris. This buildup doesn’t just look unsightly—it can also affect the performance of your fridge. The condenser coils, which are responsible for keeping your refrigerator cool, are often located at the back, underneath, or even in the front, depending on the model. When these coils get covered in dust and dirt, the appliance has to work harder to maintain the proper temperature, which can increase energy consumption and shorten the fridge’s lifespan.
Before starting, unplug the fridge or switch off the dedicated outlet from your electrical panel for safety. If your fridge is large, you may need help to carefully pull it away from the wall—avoid dragging it to prevent damage to the flooring. Using a vacuum with a brush attachment, gently remove dust and debris from the coils and surrounding areas. Pay attention to corners where dust bunnies tend to collect.
For stubborn dirt, a small, soft-bristled brush or even a toothbrush can help loosen particles. While you’re back there, check for signs of mold, leaks, or pests, as these issues are easier to handle when the fridge is pulled out. Cleaning behind and under your fridge every three to six months not only improves efficiency but can also prevent malfunctions and unpleasant odors.
Clean the Inside
A thorough interior cleaning of your refrigerator ensures it remains sanitary, odor-free, and organized. Start by removing all food items. Store perishables temporarily in a cooler with ice packs to prevent spoilage. Discard expired or questionable items to avoid contamination. Remove shelves, drawers, and any removable compartments. These can usually be washed in hot, soapy water in the sink or, for larger items, in the bathtub.
For cleaning the fridge’s interior, mix 1 cup distilled white vinegar, 1 cup water, and 1 teaspoon dish soap in a spray bottle. Wipe down all surfaces, including walls, the ceiling, drawers, and door compartments.
For stuck-on food, create a paste of baking soda and water, apply it to the stain, and gently scrub with a soft cloth or sponge. Avoid abrasive materials that could scratch surfaces. After scrubbing, rinse all areas with a damp cloth to remove any cleaning residue, then dry thoroughly with a microfiber towel to prevent water spots.
For added protection and easier maintenance, consider placing removable shelf liners or silicone mats inside the fridge. These can catch spills and crumbs, allowing you to simply remove and clean them, rather than scrubbing the shelves each time something leaks.
Organize your food as you return it—keep raw meats in designated bins or trays, store frequently used items at eye level, and place older items toward the front to ensure they get used first. This not only improves hygiene but also reduces food waste.
Clean the Exterior
The exterior of your refrigerator is exposed to fingerprints, grease, and spills, particularly around handles and doors. For stainless steel models, mix 1 part white vinegar with 2 parts water in a spray bottle. Lightly spray the solution on a microfiber cloth and wipe in the direction of the grain to remove smudges and streaks.
Avoid spraying directly onto the appliance, as excess liquid could seep into seams or electrical components. For added shine, you can finish with a small amount of mineral oil or a dedicated stainless steel polish applied with a soft cloth.
For other finishes—such as painted, textured, or black stainless steel—use a mild soap-and-water solution or a non-abrasive cleaner suitable for the surface. Don’t forget to clean the top of the fridge, which often accumulates dust and grease, especially if the appliance is near the stove or vents.
While wiping, check for accumulated crumbs or spills along the door gaskets. Keeping the gaskets clean ensures a tight seal, which helps maintain energy efficiency and prevents premature wear.
By cleaning both the interior and exterior regularly, along with the surrounding area, your refrigerator not only looks fresh but also operates more efficiently, reduces odors, and minimizes the risk of bacterial growth. Scheduling this deep clean every three to six months makes it far easier to maintain on a weekly basis.
Scrub Your Stove
Your stove sees daily use and is prone to grease and food buildup, which can harbor bacteria and attract pests.
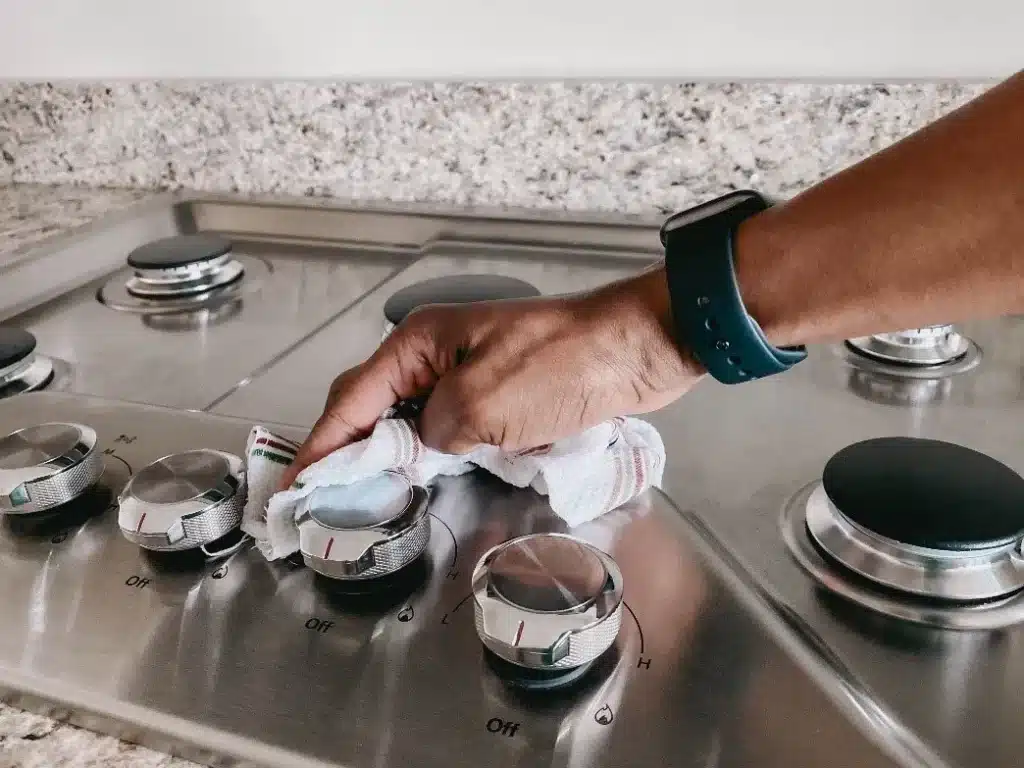
Clean the Cooktop
Your cooktop is one of the hardest-working surfaces in your kitchen, and it’s also prone to grease, burnt-on food, and spills that can accumulate quickly. Whether you have a glass, ceramic, or gas stovetop, proper cleaning helps maintain efficiency, safety, and hygiene.
For glass or ceramic cooktops, avoid abrasive scrubbers that could scratch the surface. Instead, use a soft non-abrasive pad or microfiber cloth along with a gentle cleaning solution made from distilled white vinegar, water, and a few drops of dish soap. Spray the solution on the stovetop, let it sit for a minute to loosen stubborn residue, then wipe gently in circular motions. For burnt-on spills, a small amount of baking soda sprinkled on the area before wiping can provide extra scrubbing power without damaging the surface.
For gas stovetops and burner grates, a slightly different approach is needed due to removable components. Mix 1 cup white vinegar, 2 cups warm water, and 1 tablespoon Castile soap to create a degreasing solution. Remove the grates, burner caps, and drip pans, then soak them in the solution for 15–30 minutes. Use a soft brush or sponge to scrub away grease and residue, paying attention to small holes or crevices where food tends to get stuck. Rinse thoroughly and dry completely before reassembling. Regularly cleaning the burners and cooktop not only restores the shine but also prevents uneven heating and reduces the risk of flare-ups or odors.
For electric coil stovetops, remove the coils carefully (if removable) and wipe the drip pans with warm, soapy water. Avoid submerging electrical parts in water. Cleaning the coils periodically improves cooking efficiency and extends the life of your stovetop.
Clean the Vent Hood
The vent hood above your stove does more than look decorative—it plays a critical role in removing smoke, grease, and airborne particles while you cook. Over time, grease and dust accumulate on the filters, knobs, and interior surfaces, which can reduce efficiency and even pose a fire hazard if left unchecked.
Start by removing filters and knobs. Most filters can be soaked in hot, soapy water for 15–30 minutes. For tough grease buildup, add a few tablespoons of baking soda to the water to enhance cleaning power. Use a small scrub brush or an old toothbrush to reach nooks and tight crevices, such as around vent openings and corners of the filter. Dry everything thoroughly before replacing to prevent moisture buildup, which can attract dust or mold.
Next, wipe down the exterior and interior surfaces of the hood using a mild dish soap solution or a vinegar-water mix. For stainless steel hoods, wipe in the direction of the grain with a microfiber cloth to avoid streaks. Pay attention to control buttons and switches, where grease often collects. Regular maintenance—ideally once a month—ensures your vent hood continues to ventilate effectively, keeps your kitchen air clean, and reduces fire hazards associated with accumulated grease.
Optional tips:
- If your vent hood has a recirculating filter, consider replacing or washing it according to the manufacturer’s instructions to maintain optimal airflow.
- Using a degreasing spray on the hood’s exterior can help repel fingerprints and reduce cleaning frequency.
- For kitchen safety, always ensure the hood is off and cool before cleaning.

Overhaul Your Oven
A clean oven improves cooking efficiency and prevents smoke or odors from affecting your meals.
Clean Oven Racks
Oven racks often accumulate baked-on grease, sauce splatters, and food residue, which can be stubborn to remove if left unattended. Start by removing all racks from the oven. For regular-sized racks, place them in a sink or large basin filled with hot water and a few dishwasher detergent tablets. Allow them to soak for at least two hours, or longer for heavily soiled racks.
For larger racks that don’t fit in the sink, the bathtub works well. Line the tub with an old towel to prevent scratching the metal surface. After soaking, use a non-abrasive sponge or soft brush to scrub away any remaining grease or food particles. Avoid steel wool or harsh scouring pads on non-coated racks, as they can damage the finish. Once cleaned, rinse thoroughly with warm water and dry completely before returning the racks to the oven.
Optional tips for tough grease:
- Sprinkle baking soda on the racks before soaking for extra degreasing power.
- For extremely stubborn burnt-on food, a paste of baking soda and vinegar can be applied, allowed to sit for 10–15 minutes, and then scrubbed gently.
- Clean your racks regularly—every 2–3 months—to prevent heavy buildup, which makes deep cleaning easier and faster.
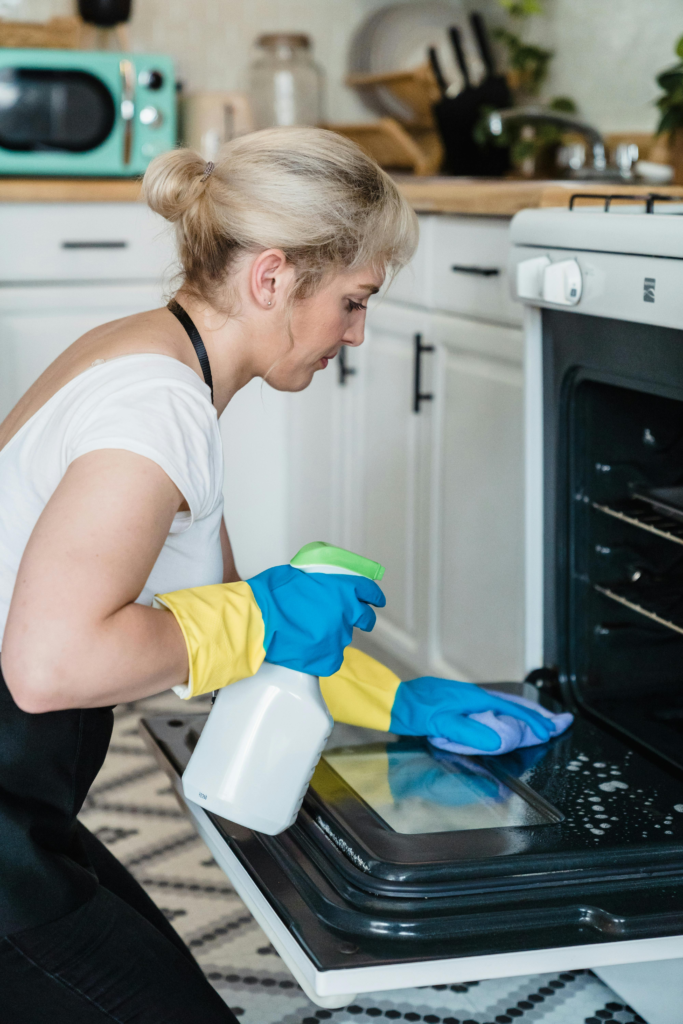
Scrub the Oven Interior
Cleaning the oven interior not only keeps your appliance looking clean but also prevents unpleasant odors and ensures food cooks evenly. Begin by removing loose crumbs and debris from the bottom using a hand vacuum or a damp cloth.
Next, prepare a mild cleaning solution of 2 cups water and 2 tablespoons dish soap in a spray bottle. Lightly mist the interior, including walls, ceiling, and floor, then allow it to sit for 5 minutes to loosen grime. For baked-on residue, gently scrub using a damp pumice stone, which provides abrasion without damaging the oven’s enamel surface.
The oven door often collects grease and fingerprints. Use a damp Brillo pad or a soft sponge to scrub the interior glass carefully, avoiding scratching the surface. Wipe away loosened debris with a damp cloth.
For warming drawers, slide them out and vacuum or wipe crumbs and food particles. These hidden areas are often overlooked but can harbor bacteria and odors if neglected.
Preventative maintenance is key: place a baking sheet on the bottom oven rack whenever roasting or baking dishes prone to spills. This simple step catches drips and reduces the frequency of deep cleaning. For everyday upkeep, wipe the oven interior lightly after each use to prevent buildup and keep your appliance performing optimally.
Additional tips:
- Avoid using harsh chemical cleaners inside self-cleaning ovens; the heat itself is usually sufficient to handle buildup during the self-clean cycle.
- For tough grease, a baking soda and water paste left on spots for 30–60 minutes before scrubbing can help remove stubborn stains naturally.
- Always ensure the oven is turned off and cooled completely before starting the cleaning process to avoid burns.
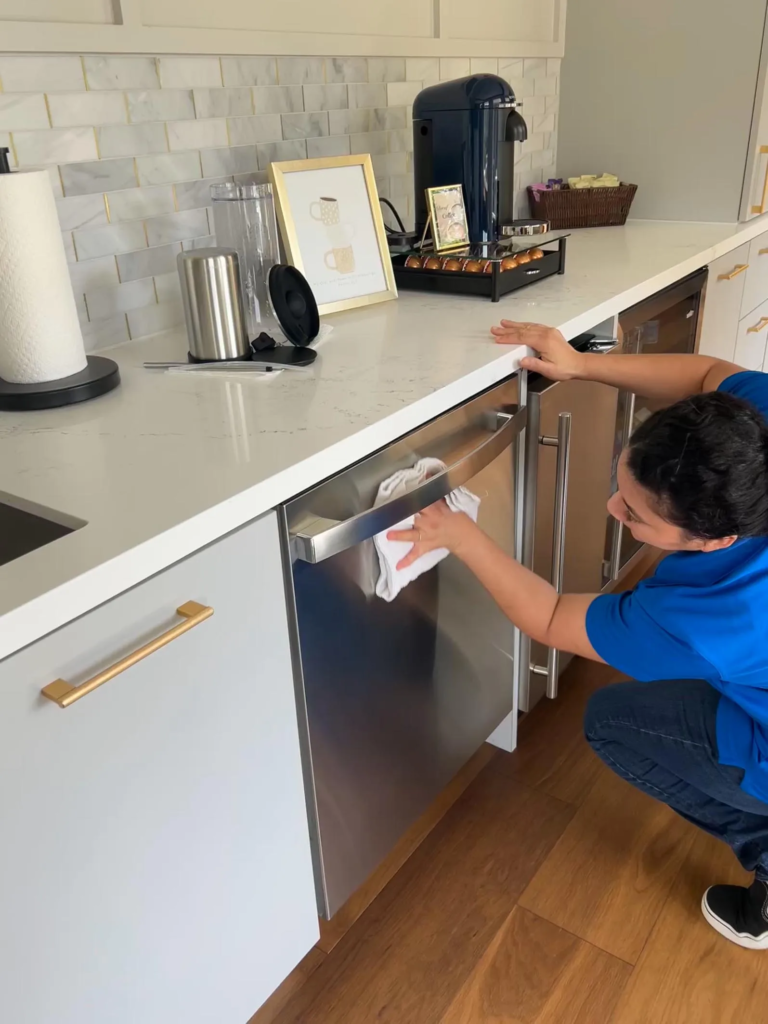
Degunk the Dishwasher
Food, grease, and mineral buildup can affect dishwasher performance.
- Clean the filter: Remove and rinse with hot water, scrubbing with a small brush if needed.
- Clean spray arms: Remove, rinse, and clear holes of buildup with a toothpick.
- Wipe seals and exteriors: Use a damp cloth to clean the door gasket and exterior surfaces.
- Deep-clean the interior: Use a commercial dishwasher pod, or a vinegar and baking soda solution. For mildew, a diluted bleach or ammonia solution works on stainless steel interiors.
Regular dishwasher cleaning improves performance, hygiene, and the lifespan of the appliance.
Conquer the Cabinets
Cabinets can hide fingerprints, grease, and dust, especially on decorative grooves.
- Remove hardware and soak knobs in hot, soapy water.
- Scrub cabinet fronts, edges, and grooves with a toothbrush or small brush.
- Wipe with a solution of hot water and mild soap, or a mix of vinegar and water (1:2 ratio).
- Dry with a microfiber cloth and replace the hardware.
Empty drawers and vacuum crumbs or use a lint roller around corners. Regularly cleaning cabinets keeps your kitchen looking polished and prevents buildup.
Get Counters Gleaming
Countertops often accumulate crumbs, spills, and grime in hard-to-reach areas.
- Clean grout with a paste of ½ cup baking soda and ¼ cup hydrogen peroxide.
- For daily cleaning, a mix of hot water and a few drops of dish soap works for most surfaces.
- Disinfect safely using a multipurpose cleaner suitable for your material or a solution of 1 part isopropyl alcohol to 3 parts water for stone surfaces.
- For wood counters, use half a lemon and salt to remove stains, and for marble, a baking soda poultice left for 24–48 hours works well.
Wiping counters regularly prevents bacteria buildup and keeps your kitchen hygienic.
Polish Pots, Pans, and Bakeware
Even with regular washing, cookware can develop burnt-on food and tarnish.
- Copper: Mix equal parts lemon juice and salt to remove tarnish.
- Stainless steel: Boil water with dish soap for 5–10 minutes to loosen scorch marks.
- Burnt pots: Simmer with water and 1 teaspoon baking soda for 30 minutes.
- Baking sheets: Apply a paste of equal parts baking soda and hydrogen peroxide for several hours to restore shine.
Proper cookware cleaning improves hygiene and prolongs equipment life.
Freshen the Floor
Kitchen floors see constant traffic from cooking, spills, and pets.
- Tile and ceramic: Vacuum daily and mop weekly.
- Wood and specialty floors: Dry mop or sweep weekly, followed by a gentle wet mop.
- Deep clean monthly with a scrub brush and cleaning solution.
- Use dryer sheets to wipe baseboards to repel dust and add a fresh scent.
Maintaining clean floors reduces allergens and enhances the kitchen’s overall appearance.

Maintain Your Microwave
Microwaves harbor splatters and odors from frequent use.
- Wipe spills immediately after use.
- For deeper cleaning, heat a bowl of water with lemon juice, then wipe interiors with a vinegar-water solution.
- Scrub stubborn food with a baking soda paste.
Regular cleaning ensures your microwave stays sanitary and odor-free.
Scrub Small Appliances
Small appliances like stand mixers, toasters, coffee makers, and air fryers also need attention.
- Clean after every use when possible.
- For appliances that see less frequent use, deep clean monthly.
- Remove crumbs, wipe exteriors, and descale if needed for appliances like coffee machines.
Keeping small appliances clean ensures long-lasting performance and prevents bacteria from spreading.